Why Do Candles Flicker? The Physics and Chemistry Explained
Ever noticed how a candle flame dances and flickers, even in a seemingly calm room? While it might seem random—or even a little magical—there’s solid science behind it. Candle flickering is the result of a delicate balance between physics and chemistry.
From air currents and oxygen supply to the way wax vaporizes and fuels the flame, several factors influence how steady—or unstable—a flame becomes. In this article, we’ll break down the real reasons why candles flicker and what’s happening on a microscopic level each time that flame wavers.
Understanding Candle Combustion
When you light a candle, you kick off a surprisingly complex process called candle combustion. It starts with the wax—made mostly of hydrocarbons—melting near the wick. This melted wax travels up the wick through capillary action and then vaporizes in the heat of the flame. Once it becomes vapor, it reacts with oxygen in the air, creating carbon dioxide, water vapor, heat, and light.
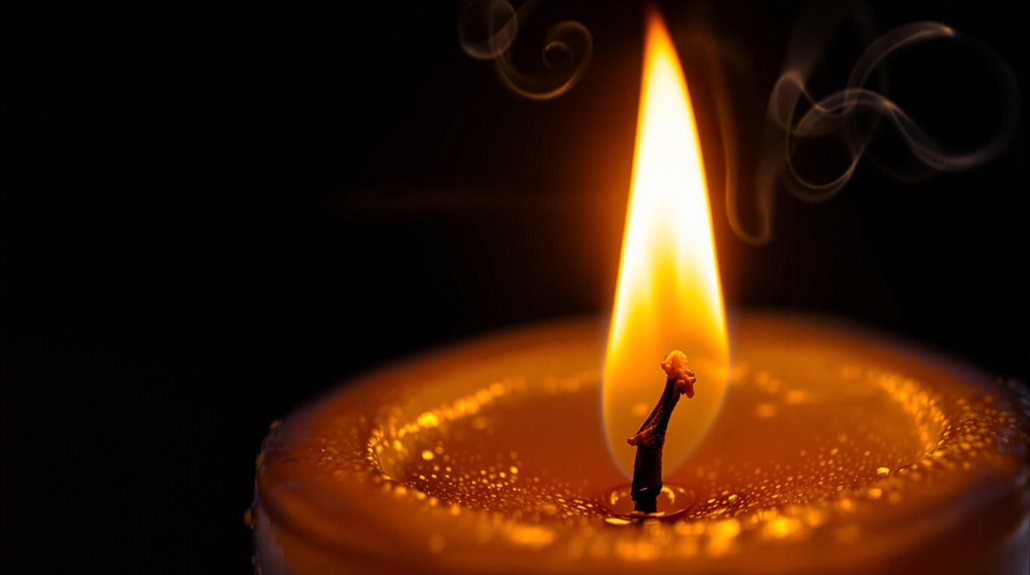
The candle flame itself has different zones. At the bottom, where oxygen is more plentiful, you’ll see a blue part of the flame—this area is where complete combustion happens. Higher up, the flame turns yellow, caused by tiny, unburned carbon particles glowing in the heat. This yellow zone is a sign of incomplete combustion.
For the flame to stay steady, two things are crucial: a steady flow of melted wax and a good supply of oxygen. As long as these are present, the combustion cycle continues—melting wax, drawing it up the wick, turning it into vapor, and burning it—until the wax runs out. High-quality wicks are crucial for maintaining a clean and stable flame, ensuring efficient candle combustion.
The Role of Airflow and Temperature
Now that we’ve looked at how combustion works, let’s explore how airflow and temperature affect a candle’s flickering flame.
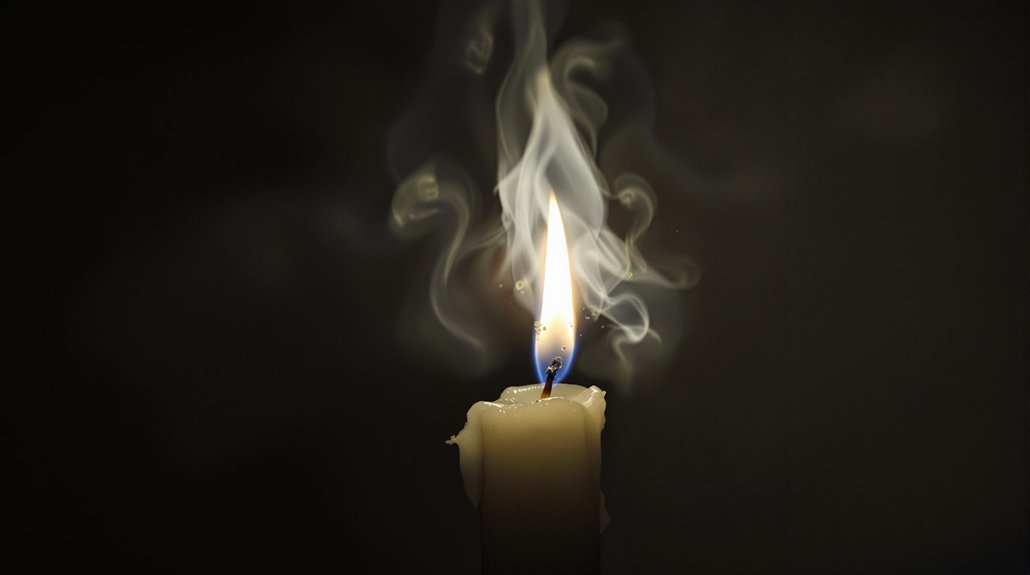
A flickering flame is often the result of uneven burning. As the wax vapor burns, it creates convection currents—hot air rises above the flame, while cooler air moves in to take its place. These shifting airflows disturb the flame, causing it to sway, dim, and brighten.
Temperature differences around the flame also play a big role. Warmer air becomes less dense and rises, while cooler air is pulled in from the surrounding area. This creates constant movement, which can cause the flame to oscillate or jump. These fluctuations are part of a natural process called thermal expansion, where heated air expands and adds to the turbulence.
On top of that, changes in oxygen availability—even slight ones—can affect how completely the wax vapor burns. If there’s a brief drop in oxygen, the flame may dim or flicker as the combustion process adjusts.
Even humidity in the air can make a difference. High moisture levels can interfere with how efficiently the wax evaporates and burns, adding another layer of instability to the flame.
Understanding how these forces work together gives you a better sense of why candle flames flicker, even in rooms that feel perfectly still. To maximize heat output from candles, it's helpful to use pavers under candle heaters, which facilitate airflow and boost warmth.
Incomplete Combustion and Soot Formation
Although candles create a warm and inviting atmosphere, they can also produce soot due to incomplete combustion. This occurs when the candle flame doesn’t get enough oxygen, causing it to burn inefficiently. As a result, unburned carbon particles form, leading to soot formation.
The yellow part of the candle flame is a telltale sign of incomplete combustion. It reaches temperatures around 1200°C (2190°F) and emits visible light because of these ignited carbon particles.
When the oxygen supply varies, the flame flickers, affecting the combustion process and resulting in fluctuating soot and smoke levels. High humidity can further disrupt the combustion process by hindering wax evaporation and burning, which increases the likelihood of soot emissions from the candle flame.
Influence of Wick Size and Shape
The wick plays a crucial role in how your candle burns, directly impacting the stability of the flame. When considering wick size and shape, remember these points:
- Wick Size: A thicker wick can lead to larger flames and more wax vapor, increasing flicker risk. Too long a wick draws excessive wax, causing instability. Conversely, a short wick mightn't draw enough wax, leading to flickering or extinguishing.
- Wick Shape: Flat or braided wicks help evenly melt wax, promoting flame stability. Round wicks mightn't offer the same consistency.
- Clean Burn: Proper wick design guarantees a clean burn by balancing wax and oxygen, minimizing flickering.
Understanding these factors helps you maintain a steady flame and enjoy your candle's glow without interruptions. To enhance candle safety, natural waxes like soy and beeswax are recommended as they burn cleaner and longer, reducing soot and flickering.
Exploring the Dynamics of Candle Flickering
Now that we’ve touched on wick size and shape, let’s take a closer look at why candle flames flicker in the first place.
Flickering usually starts with uneven burning. As the flame heats the air around it, convection currents begin to form—hot air rises, cooler air moves in to replace it. This movement disrupts the steady flow of oxygen to the flame. Since oxygen is a key ingredient in combustion, even small shifts in its supply can cause the flame to waver, brighten, or dim.
This process is driven by thermal expansion: as air heats up, it becomes lighter and rises, while cooler, denser air rushes in. These constantly shifting airflows throw off the balance of the flame, leading to the familiar flickering effect.
Other factors can make the flickering worse. For example, a wick that’s too thick, too thin, or irregularly shaped may not draw wax evenly, leading to an unstable flame. Interruptions in the wax supply—such as tunneling or impurities—can also create inconsistent fuel delivery, which shows up as flickering.
Even humidity in the environment can influence flame behavior. High moisture levels can make it harder for the wax to vaporize properly, affecting how efficiently it burns.
Interestingly, the frequency of the flicker—how fast or slow it pulses—can vary based on oxygen levels. This means that what you see isn’t random: it reflects real-time changes in the candle’s combustion environment.
Understanding these dynamics helps explain the science behind a candle’s unpredictable yet mesmerizing dance.
Experimental Studies on Candle Behavior
When researchers investigate experimental studies on candle behavior, they uncover fascinating insights into the dynamics of flame oscillation. By examining how a candle burns, these studies reveal that oscillation frequencies are influenced by both the number of candles and oxygen concentration.
With a single candle, you’ll find that the flame oscillates at 11.54 Hz when oxygen levels exceed 70%.
Here’s what you need to know:
- Increasing the distance between candles results in uncorrelated flickering, while closer flames synchronize in-phase.
- High-speed cameras and specialized devices capture oscillation frequencies in diverse oxygen-nitrogen mixtures.
- Higher oxygen concentrations reduce oscillation frequencies.
These findings help develop new dynamical models that explain the collective behavior and synchronization of candle flames under different conditions.
Practical Tips for Minimizing Flickering
Tired of watching your candle flame dance around instead of burning steadily? A few simple adjustments can help you enjoy a smoother, more consistent burn.

1. Choose High-Quality Candles
Start with well-made candles using clean-burning, high-grade wax. Premium wax tends to melt more evenly and maintain a stable flame throughout the burn.
2. Trim the Wick Before Each Use
Always trim the wick to about 1/4 inch before lighting. An overly long wick can create a large, unstable flame that flickers more and produces soot. A properly trimmed wick keeps the burn controlled and efficient.
3. Avoid Drafty Areas
Place your candle away from vents, open windows, fans, or high-traffic areas. Even small air currents can disrupt the flame’s oxygen supply, causing it to flicker or burn unevenly.
4. Use Protective Holders or Jars
Using a candle jar or glass holder can help shield the flame from environmental disturbances. This acts like a windbreak, allowing the flame to stay steady and centered.
5. Keep the Wax Surface Clean
Before lighting, make sure there’s no dust, wick trimmings, or debris on the candle’s surface. These impurities can interfere with how evenly the wax melts and cause unnecessary flickering or popping.
By following these tips, you’ll extend your candle’s life, reduce soot buildup, and create a calm, flicker-free ambiance.