DIY Solar Lantern Projects for Self-Sufficient Homes

Did you know that nearly 30% of the energy used in average households can be offset by renewable sources, including solar power? As you're considering ways to make your home more self-sufficient and environmentally friendly, DIY solar lantern projects present an appealing avenue.
These lanterns not only illuminate your space with a sustainable glow but also significantly cut down on your electricity bills and carbon footprint. You'll find that assembling your own solar lantern is simpler than you might imagine, with a variety of materials and designs to fit your specific needs and aesthetic preferences.
Whether you're an experienced DIYer or a novice eager to embark on a new project, there's a solar lantern blueprint waiting for you. The question now is, how do you choose the right materials and design to ensure your lantern is both efficient and stylish?
Stick around, and we'll explore the key considerations and steps to creating a solar lantern that lights up your home while keeping your environmental conscience clear.
Key Takeaways
- Proper selection of solar panels, batteries, and LEDs is crucial for efficiency and durability in DIY solar lantern projects.
- The assembly and circuit of the solar lantern should be organized and enclosed in a weatherproof enclosure for optimal functionality and longevity.
- Switch installation is important for seamless functionality and stability of the solar lantern.
- Testing, maintenance, and additional ideas such as incorporating decorative elements and using solar lanterns for various purposes can enhance the functionality and aesthetics of DIY solar lantern projects.
Choosing Your Materials
Selecting the right materials is crucial for building an efficient and durable DIY solar lantern. You'll need to start with choosing a solar panel that fits your power needs. Solar energy, harnessed through these panels, is the heart of your DIY Solar Water or lantern project. You're not just looking for any solar panels, but those optimized for small-scale, outdoor solar applications.
Next, you can't overlook the importance of a charge controller. This little device ensures your rechargeable batteries don't overcharge, extending their life and making your solar-powered creation more reliable. Speaking of batteries, opting for high-capacity ones means your lantern will glow longer into the night, making your outdoor space cozier.
The choice of light source matters too. Energy-efficient LED lights are your best bet. They consume less power, which means your solar cells don't have to work as hard, and your batteries last longer.
Necessary Tools
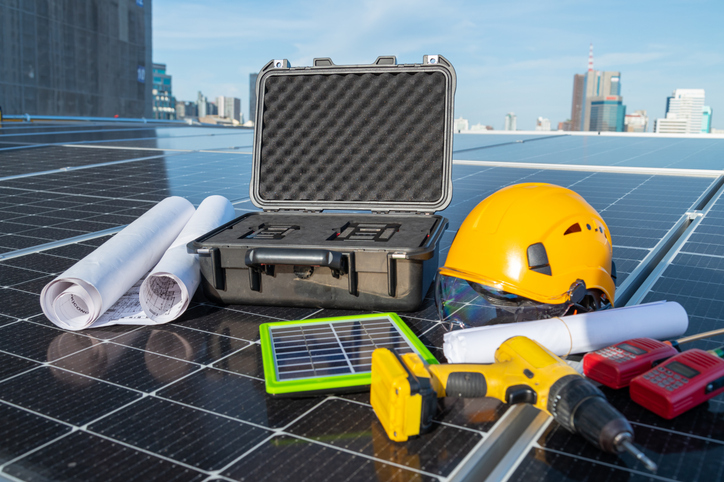
Once you've chosen your materials, it's time to gather the necessary tools to bring your solar lantern project to life. Having the right tools is crucial for successfully building a DIY solar lantern that harnesses renewable energy for your outdoor lighting needs.
These tools will help you assemble the components like the battery, solar panel, and charging circuit, ensuring they're properly connected and can efficiently convert direct sunlight into power for your solar lights.
Here are the essential tools you'll need:
- Soldering wire and lead: For creating secure connections between the components of your solar lantern, ensuring efficient energy flow.
- Hot glue gun: To firmly secure the components inside the enclosure, enhancing the durability of your solar lights.
- Drill (optional): Useful for making holes in the enclosure for wire routing, facilitating a cleaner assembly process.
- Pliers: Necessary for handling and securing wires during the assembly, making the process smoother and safer.
Preparing the Assembly
Having gathered your tools, it's now time to focus on assembling your DIY solar lantern, starting with organizing all necessary components. Building a simple yet effective lantern harnesses the power of the sun to light up your home, making it an essential skill for self-sufficient living. You'll connect the solar panel, which provides the energy, to a charge controller, ensuring your battery charges safely. Then, link the battery to the LED light, ready to illuminate your space with solar-powered electric light. Encase everything in a sturdy, weatherproof wooden box or your chosen enclosure to protect your setup.
Testing your creation is crucial. Place it in sunlight; the solar panel provides the needed energy to charge the battery, which in turn powers the LED, bringing your lantern to life. This simple process captures the essence of harnessing solar energy, much like a solar cooker concentrates the sun's rays.
| Project Component | Emotional Impact |
|---|---|
| Solar Panel | Hope |
| Battery Charging | Security |
| LED Light | Joy |
| Enclosure | Safety |
| Solar Oven | Curiosity |
This table mirrors the journey from gathering components to experiencing the warm glow of your lantern, powered by the sun, embodying hope, security, joy, safety, and an endless curiosity for what more you can achieve with the sun's power.
Solar Charging Circuit
To ensure your solar lantern functions optimally, it's crucial to understand and assemble the solar charging circuit correctly. This component is the heart of your DIY solar lantern projects, enabling self-sufficient homes to leverage the sun's energy to heat and light spaces efficiently. By following a few key steps, you can ensure your solar-powered lantern not only works effectively but also contributes to reducing energy costs through clean energy utilization.
Here's how to get started:
- Connect the battery to the charge controller to regulate the energy flow, ensuring your battery and solar panel communicate effectively.
- Attach the LED light to the battery, making sure it receives the correct amount of power to illuminate your space without overloading.
- Encase the solar charging circuit in a weatherproof and durable enclosure to protect it from environmental elements, ensuring longevity and reliability.
- Test the setup by charging it in sunlight and verifying the LED light functions as expected. This step is critical to confirm everything is working seamlessly.
Installing the Switch

After assembling your solar charging circuit, the next step is to install the switch, a crucial component for controlling your lantern's light. First, you'll need to determine the perfect spot within the lantern enclosure for the switch. It's like finding the ideal location for a solar still to get clean drinking water; placement is key.
Once you've decided on the location, drill a hole in the enclosure to fit the switch. It's a simple step, much like setting up a basic desalination system to harness the sun's heat for clean water.
Next, connect the switch to the circuit. Pay close attention to the wiring and polarity—getting this right ensures your Solar Water Distiller of light works flawlessly. Think of it as channeling the energy to heat water, but instead, you're directing electricity to light up.
Before securing the switch, test it. It should turn the LED light on and off without a hitch, proving that your Solar-Powered Desalination project of light is indeed worth the effort.
Finally, secure the switch in place. It ensures it won't move or get damaged, much like protecting a simple water system from the elements.
| Step | Tool Needed | Key Consideration |
|---|---|---|
| Placement | - | Accessibility |
| Drilling | Drill | Correct Size |
| Wiring | Wire Stripper | Polarity |
| Testing | - | Functionality |
| Securing | Screwdriver | Stability |
This table should help keep you on track, ensuring your DIY project illuminates your self-sufficient home effectively.
Assembling the Lantern
With the switch now installed, it's time to focus on assembling the lantern, ensuring all components are properly enclosed and connected for optimal functionality. This step is crucial in bringing your DIY solar lantern projects to life, providing a sustainable source of light for your self-sufficient home.
Here's how you can proceed:
- Connect the solar panel to a charge controller. This will help regulate the battery charging process, ensuring your lantern's longevity.
- Once the solar panel is connected, link the battery to the charge controller and then connect the LED light to the battery. This setup will store the electricity generated and power the light.
- Enclose all components in a weatherproof and durable enclosure. This is essential to protect your lantern from the elements, making it suitable for outdoor use.
- Finally, test your DIY solar lantern by charging it in sunlight and verifying the functionality of the LED light. This step confirms that your assembly is correct and the lantern is ready for use.
If you're not experienced in electronics and soldering, don't hesitate to seek help. Assembling a solar lantern is a rewarding project that contributes to a more self-sufficient home by harnessing free solar energy for electricity.
Testing Your Lantern
Before using your solar lantern regularly, it's essential to test its performance and durability under various conditions.
First, you'll need to ensure the solar panel gets direct sunlight. This step is crucial for charging the battery to its full capacity, optimizing your lantern's performance.
After soaking up the sun, switch on the LED light to confirm it works. This simple test guarantees your home's lighting system won't leave you in the dark when you're trying to cut down on the electricity bill that's always a concern.
Next, it's wise to expose your lantern to different outdoor conditions. Whether it's rain or a windy day, checking the durability and weatherproofing keeps you prepared. Observing how long the lantern stays lit after a full charge will verify the battery's capacity, ensuring it meets your needs.
Lastly, don't forget to periodically check the connections and components. Maintaining the efficiency of your lighting system is vital.
Maintenance Tips
To keep your solar lantern shining bright, regular maintenance is key. Whether it's to illuminate your home or be helpful during a night when the electricity is out, ensuring your lighting system will light up is crucial. You always want to be prepared, especially if you rely on your lantern to work during the afternoon into the evening when you need light the most.
Here are a few tips to make sure your solar lantern will always work:
- Regularly clean the solar panel to ensure optimal energy conversion. Dirt and debris can hinder its ability to charge effectively.
- Check and tighten any loose connections to prevent power interruptions. This simple step can save you from unexpected darkness.
- Inspect the battery for corrosion and ensure it's securely connected. A healthy battery means your lantern will be ready when you need it.
- Ensure the enclosure is weatherproof and durable to protect the components from the elements. This is especially important for outdoor lanterns.
I highly recommend following these maintenance tips to guarantee your solar lantern remains a reliable source of light, whenever you need it.
Additional Ideas
Exploring additional ideas can dramatically enhance the functionality and aesthetic appeal of your solar lanterns. One way to personalize your lanterns is by incorporating decorative elements such as colored glass or mosaics. This not only adds a unique touch but also casts beautiful patterns of light in your home, turning an ordinary afternoon or night into a magical experience.
Don't hesitate to experiment with different shapes and sizes for your lantern enclosures. Doing so can help you create one-of-a-kind designs that perfectly fit your space and style. Plus, integrating a motion sensor can elevate the convenience and security of your solar lanterns, activating them in response to movement, which is especially handy during power outages.
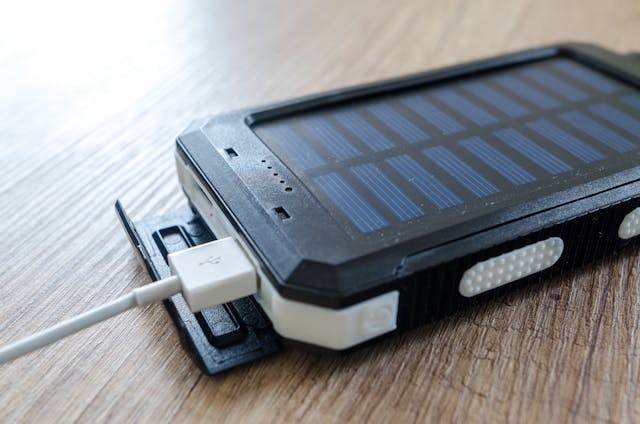
For those of you who love spending time outdoors, consider using your solar lanterns to enhance your garden's ambiance. Hanging them from trees or arranging them in creative patterns can transform your garden into a mystical retreat at night. Additionally, adding a USB port to your lantern design allows you to charge small devices using solar power, ensuring you're always connected, even during a power outage.
These additional ideas not only increase the utility of your solar lanterns but also contribute to a more self-sufficient and personalized home.
Conclusion
You've now crafted your own DIY solar lantern, a beacon of sustainability for your self-sufficient home. With the right materials and a bit of elbow grease, you've embarked on a journey towards reducing your carbon footprint.
Remember to maintain your lantern and explore additional ideas to enhance its functionality. Enjoy the warm glow of your creation, knowing it's powered by the sun and your ingenuity. Let it light up your nights, all while keeping your energy costs down.