Crafting Homemade Lanterns From Household Items
In the quiet corners of your home, where light and shadow play a timeless dance, lies the potential to transform the mundane into the magical. You've likely passed by these everyday items without a second thought – tin cans awaiting recycling, mason jars collecting dust, and paper bags tucked away.
Yet, with a spark of creativity and a touch of craftsmanship, you can breathe new life into these overlooked objects, crafting homemade lanterns that add a warm glow and a personal touch to any space. This endeavor not only recycles and upcycles but also invites you to explore the bounds of your imagination and dexterity.
Whether you're looking to illuminate a cozy evening or add a festive flair to your gatherings, the journey from ordinary to extraordinary begins with the simplest of materials. Let's embark on this creative voyage together, discovering how the transformation of basic household items into enchanting lanterns can brighten your home in ways you've yet to imagine.
Key Takeaways
- Crafting homemade lanterns from household items is a fun and eco-friendly activity that allows for personalization with different designs.
- Repurposing materials like tin cans, plastic bottles, paper, mason jars, clothespins, and scrap wood can create unique and customized lanterns.
- Homemade lanterns offer a cost-effective alternative to store-bought options and can be tailored to complement any space or occasion.
- Crafting homemade lanterns is a creative way to elevate the ambiance of a room or outdoor setting, adding a cozy glow and a touch of personal expression.
Tin Can Lantern Magic
Transforming ordinary tin cans into enchanting lanterns not only repurposes household items but also ignites your creativity. This DIY project is a brilliant way to delve into the world of tin can lantern magic, turning everyday objects into something extraordinary. With just a few simple materials like tin cans, a hammer, nails, and a design template, you're set to create your own unique lanterns. It's an activity that's not only fun but also eco-friendly, giving those old cans a new lease on life.
Decorating your lanterns can be a creative journey for both kids and adults, allowing everyone to add their personal touch. Whether you're aiming for intricate patterns or simple designs, the process offers endless possibilities for personalization. You'll find yourself experimenting with different designs, each lantern becoming a reflection of your imagination.
Moreover, these lanterns cast a warm and inviting glow, perfect for enhancing the ambiance of both indoor and outdoor spaces. By embracing the tin can lantern magic, you're not just crafting; you're transforming your environment with pieces that tell a story - your story.
Paper Bag Luminaries
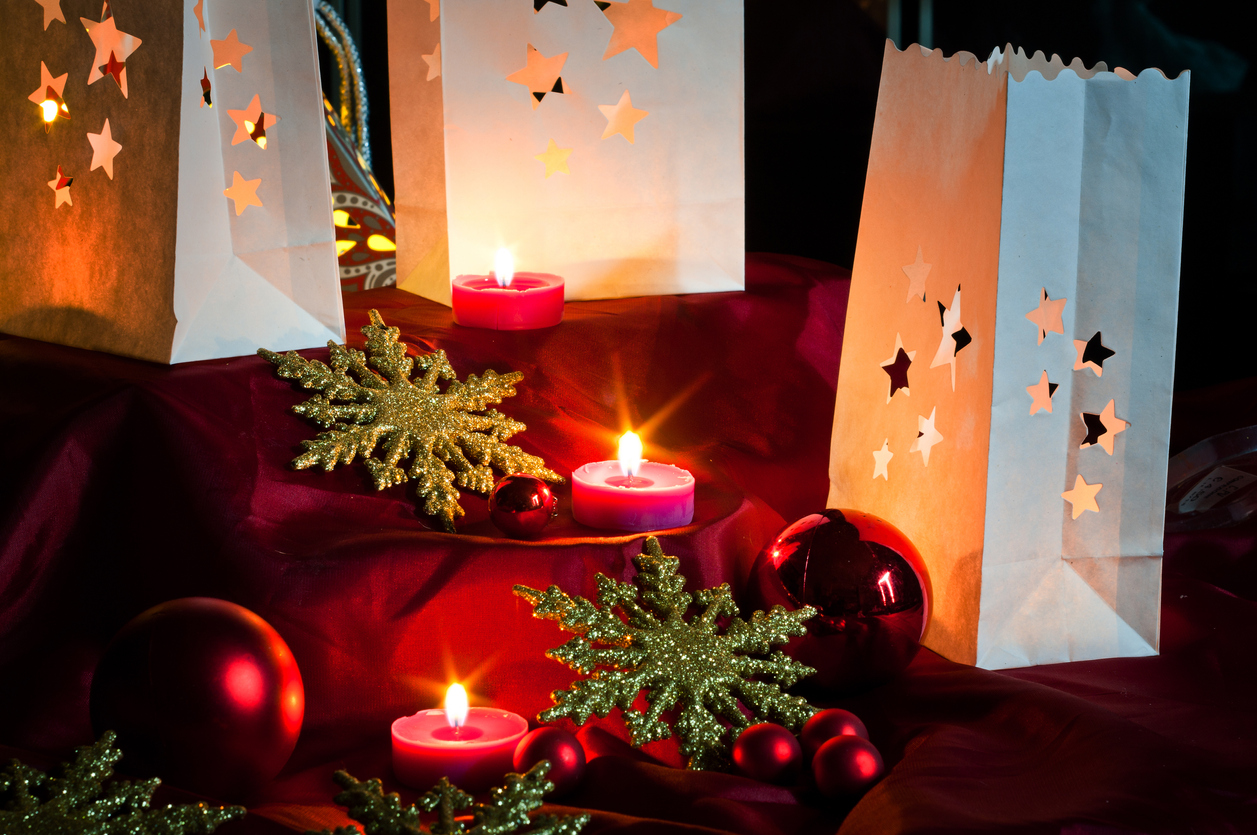
Shifting our focus to paper bag luminaries, you'll discover a simple yet impactful way to illuminate any occasion with items you likely already have at home. These DIY decorative pieces add a cozy glow and can be customized to fit any theme or style, making them an ideal choice for personalizing your space.
Start by selecting coverstock paper for your luminaries; its extra sturdiness will ensure they hold up better than regular paper. Cut out the necessary pieces and fold the side pieces to form a box shape, securing them with glue for a solid structure.
Next, bring your paper bag luminaries to life by experimenting with different layers and colors of spray paint. This step allows you to create a unique finish that can match any decor.
For a polished look, add a slightly opaque window using plexiglass or clear plastic craft sheets. This not only adds weight to your luminaries, making them more stable, but also diffuses the light beautifully.
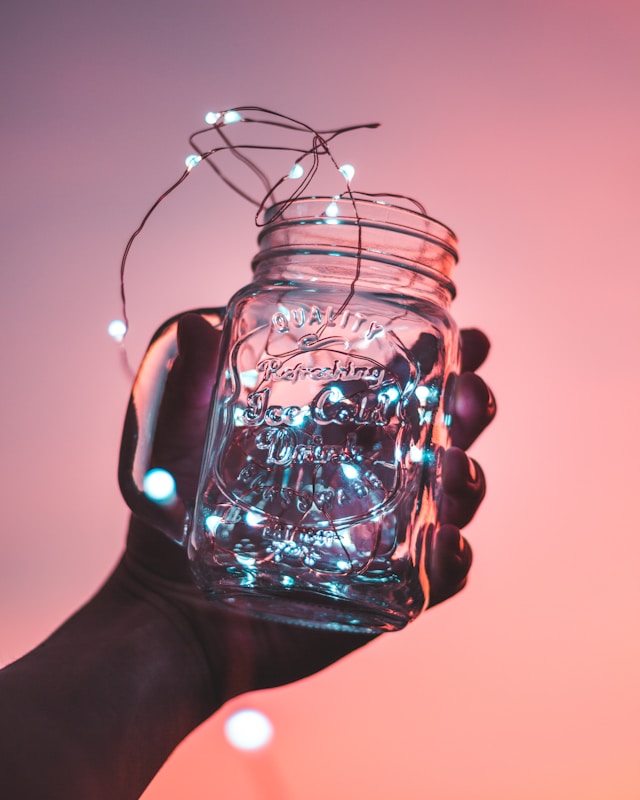
DIY Mason Jar Lights
After exploring the charm of paper bag luminaries, let's turn our attention to the equally enchanting world of DIY mason jar lights. These unique lanterns offer a versatile and creative lighting solution that's perfect for both indoor and outdoor spaces. By crafting homemade lanterns from household items like mason jars, you're stepping into a realm of endless possibilities for home decor.
Creating your own DIY mason jar lights isn't only cost-effective but also allows for a high degree of customization. Here are a few key points to remember:
- Versatility: Mason jar lanterns can be repurposed and upcycled into unique designs that reflect your personal style.
- Customization: These lanterns can be enhanced with various decorative elements, making them a perfect match for different themes or styles.
- Simplicity: With just a few simple steps and materials, you can create a personalized lighting solution that adds a charming touch to any setting.
Embracing the DIY ethos in home decor not only personalizes your space but also provides a sense of achievement. Dive into the world of DIY mason jar lights and illuminate your home with a touch of creativity and warmth.
Creative Clothespin Lanterns
Venturing into the world of creative clothespin lanterns offers a fresh twist on homemade lighting, allowing you to craft unique and customizable designs using simple household items. By using clothespins, you can experiment with a range of sizes and shapes to make DIY lanterns that reflect your personal style. Don't forget to grab your hot glue and glue gun, as they'll be crucial in assembling your creations.
Here's a visual guide to get you started:
| Design Ideas | Materials Needed | Decoration Tips |
|---|---|---|
| Classic Circle | Clothespins, LED light | Paint in bright colors |
| Elegant Spiral | Clothespins, glue gun | Add glitter for sparkle |
| Geometric Shapes | Various sizes of clothespins, hot glue | Use varnish for a polished look |
After assembling your lantern base with clothespins, customize it with paint, glitter, or other embellishments for that personalized touch. Whether you choose to illuminate your lanterns with LED lights or candles, these creative clothespin lanterns will surely brighten up any space with their unique charm and warmth.
Recycled Bottle Illumination
Building on the innovative spirit of using household items for crafting, let's explore how empty plastic bottles can be transformed into captivating lanterns for any occasion. Recycled bottle illumination brings a unique charm to your space, blending creativity with eco-friendliness. You're not just making lanterns; you're lighting up your surroundings with a piece of art that tells a story of sustainability and imagination.
To create your recycled bottle lanterns, consider these steps:
- Collect and Clean: Start by gathering various sizes and shapes of clear plastic bottles from your recycling bin. Clean them thoroughly to remove any labels or residue.
- Design and Decorate: Use paint, markers, or decoupage to add your personal touch to each bottle. You can go as simple or as intricate as you like.
- Illuminate: Insert real candles or, for a safer alternative, battery-operated tea lights into the bottles. If using real candles, ensure the bottle is well-ventilated to avoid overheating.
Recycled bottle illumination not only adds a warm glow to your evenings but also serves as a conversation starter. It's a testament to your commitment to upcycling and your flair for creative expression. Whether you're setting the mood for a cozy night in or adding a festive touch to your outdoor gatherings, these handmade lanterns are sure to impress.
Colorful Yarn Lanterns
Let's dive into the world of colorful yarn lanterns, a creative project that transforms simple materials into stunning decorative pieces. You're about to discover how making DIY lanterns with just yarn and a few household items can lead to beautiful DIY paper lanterns without much fuss. Here's an easy tutorial to guide you through.
- First, grab some colorful yarn and wrap it around a balloon. This will create the base of your lantern.
- Next, mix glue with water and apply it generously over the yarn-wrapped balloon. Patience is key here; let it dry completely.
- Once it's dry, the exciting part comes: pop the balloon and gently remove it, leaving behind your yarn structure.
- Now, add a handle using more yarn, perfect for hanging your creation anywhere you like.
Don't be afraid to experiment with different colors and patterns. This is where your creativity shines, making each lantern uniquely yours. Whether you're looking to add a cozy touch to your room or preparing for a festive celebration, these vibrant yarn lanterns are sure to brighten up any space.
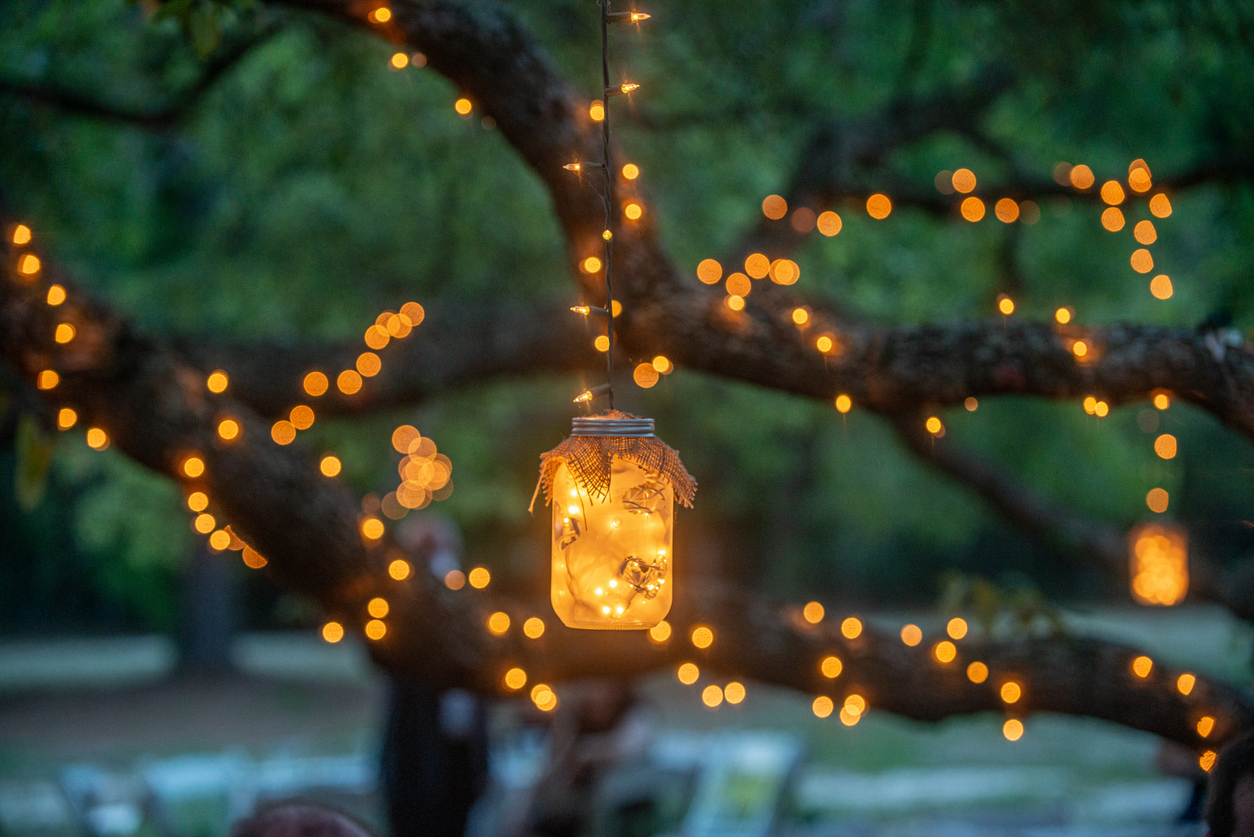
Fairy Light Jars
After exploring the vibrant world of yarn lanterns, we turn our focus to the enchanting simplicity of Fairy Light Jars, another captivating way to illuminate your space. These charming lanterns are a great, straightforward way to create soft, ambient lighting that can transform any room or garden into a magical setting. By placing fairy lights inside glass or mason jars, you can quickly craft a spellbinding effect that's hard to miss.
To add depth and complexity to your Fairy Light Jars, consider incorporating:
- Decorative elements like ribbons or glitter to enhance their visual appeal.
- Colored tissue paper on the inside of the jars for a diffused, colorful glow.
- Sand or pebbles at the bottom of the jars for a rustic or beachy theme.
These homemade lanterns aren't only versatile, fitting seamlessly into both indoor and outdoor décor, but they're also a popular choice for weddings, parties, and creating a cozy atmosphere in any space. The addition of fairy light jars to your decor arsenal offers an easy yet effective way to elevate the ambiance of your surroundings, proving that sometimes, simplicity truly is the height of sophistication.
Scrap Wood Lanterns
Diving into the world of DIY, creating your own scrap wood lanterns offers a unique and personalized way to brighten up your space. With just a few household items, you can transform scrap wood into stunning lanterns that reflect your style. First, gather your tools: a scroll saw, nail gun, and wood glue are essential for construction. Next, choose a lantern pattern that speaks to you. This step is where your creativity really shines, allowing you to tailor your project for a truly customized look.
Making DIY wooden lanterns isn't only fun but also incredibly cost-effective. Instead of shelling out for store-bought wooden lanterns, you're repurposing what you already have at home. Once your lantern is assembled, it's time to add the finishing touches. A coat of spray paint can elevate your scrap wood lanterns, turning them from simple to chic in no time. Remember, the color and finish of the paint can drastically change the vibe of your lanterns, so choose something that complements your space.
Cardboard Box Nightlight
Turning to a more readily available material, you can easily craft a charming cardboard box nightlight that adds a soft glow to any room. This project transforms mundane materials into a delightful decorative element, proving that crafting homemade lanterns doesn't require expensive supplies or complicated tools. By using scrap cardboard boxes, you create a unique and cost-effective nightlight that's both fun to make and beautiful to display.
To bring your cardboard box nightlight to life, you'll need to:
- Cut out desired shapes from the cardboard to form the structure of the nightlight, allowing for creativity and personal expression.
- Secure the pieces together with glue or tape to assemble the nightlight, ensuring it's sturdy and well-constructed.
- Add a small LED light or string lights inside the cardboard structure to illuminate it, turning your creation into a captivating feature.
Conclusion
Now, you've got all the inspiration you need to transform everyday items into enchanting lanterns. Whether it's turning tin cans into magical light sources, crafting luminaries from paper bags, or repurposing mason jars into glowing wonders, the possibilities are endless. Dive into your recycling bin, grab some basic supplies, and start creating.
It's time to light up your space with your very own handmade lanterns. Let your creativity shine and make those dark corners sparkle with warmth and charm.