Are you interested in building a rocket stove using minimal materials? This design is not only quick to assemble but also efficient for cooking, using minimal wood while maximizing heat. If you’re looking to enhance your cooking experience, consider fine-tuning these elements.
Gathering Your Materials
Before you start constructing your rocket stove, ensure you have gathered all the necessary materials: four cinder blocks, a hammer, a cooking grate, small branches, and a fire starter.
Using items you already have at home is sustainable, so check for any reusable materials such as cinder blocks and grates from previous projects. For the small branches needed as fuel, consider sourcing them locally by exploring your neighborhood or nearby parks, which also offers a chance to enjoy some fresh air.
Ensure the cinder blocks you choose can form a stable structure, with a top hole that allows for efficient heat management essential for cooking. The cooking grate should fit securely over this top hole to support your cookware safely.
With all materials prepared and verified for suitability and stability, you’re ready to proceed to the building phase of your rocket stove.
Preparing the Cinder Blocks
Begin by placing one cinder block horizontally as the foundation of your rocket stove. Ensure the holes are oriented sideways to facilitate wood insertion and effective airflow, crucial for a steady and robust flame.
Add another cinder block vertically at one end of the base, which serves as the chimney. This configuration directs the smoke upward, keeping it away from the cooking area. Ensure this block is securely positioned as it’s critical to the stove’s overall stability and functionality.
Modify a cinder block by removing one end to create an opening for fuel insertion, akin to a doorway. Place this altered block with its open end adjacent to the vertical chimney block. This setup promotes optimal airflow, vital for sustaining combustion.
Setting Up the Base
To construct the base of your rocket stove, start by placing one cinder block horizontally, so the holes are oriented sideways. This step is crucial as it establishes the foundation of your stove.
Then, proceed with the following steps to ensure stability and functionality:
- Align another cinder block vertically at one end of the base block to create a stable and level structure.
- Modify a cinder block by removing one end to create an opening for fuel insertion. Ensure this modified block is positioned with the open end towards the vertical block to facilitate optimal airflow.
- Place an additional cinder block on top of the base block to reinforce the structure and enhance its durability.
- Inspect all joints between the cinder blocks to confirm they’re tightly connected, reducing the risk of structural failure.
Setting up your rocket stove with these steps provides a robust and functional base, ready for efficient operation.
Assembling the Feeding Chamber
After establishing the base, commence the construction of the feeding chamber by positioning a cinder block flat, ensuring the holes face sideways. This block serves as the foundation for fueling the fire.
Subsequently, place another cinder block at one end of the base block, acting as the rear boundary of the feeding chamber to prevent materials from escaping.
Next, modify another cinder block by removing one end. Position this adjusted block facing the end block you previously set, creating an open front that facilitates easy access for managing the fire.
This setup allows for efficient feeding and maintenance of the fire within the chamber.
Placing the Top Block
Carefully place the final cinder block on top of the stack to finalize your rocket stove construction. This step is crucial for ensuring that the stove functions efficiently. Confirm that the block is stable to prevent any disruptions during cooking.
Follow this checklist to ensure proper setup:
- Check Stability: Press down gently on the block to ensure it doesn’t move. It must be stable.
- Level Surface: Use a level to verify that the top of the block is flat. A level surface is essential to keep the cooking pot stable.
- Airflow Check: Make sure there are no blockages around the edges that might restrict airflow into the stove.
- Alignment: The top block must align precisely with the blocks below to maintain structural integrity.
- Inspect for Cracks: Carefully examine the block for any cracks or damage that could impair the stove’s performance.
Adding the Cooking Grate

After installing the top block, the next step is to set up the cooking grate. Choose a material that’s durable and can endure high temperatures while providing stable support for your cooking utensils.
It’s crucial to correctly position the grate to prevent it from moving during use. This ensures safety and efficiency in cooking.
Selecting Your Grate Material
Selecting the right grate material for your rocket stove is crucial for optimal performance. Here are essential guidelines to ensure you choose the best grate:
- Metal Grate: Choose a metal grate for its durability and ability to withstand high temperatures without warping. Metal grates also promote excellent airflow, essential for a strong, stable flame.
- Recycled Oven Rack: Using an old oven rack is a sustainable choice that can be economical. Ensure it fits properly in your rocket stove to maintain stability and even heat distribution.
- Avoid Contact with Cinder Blocks: Don’t place your cooking pan directly on the cinder blocks as it can cause damage to both the pan and the blocks.
- Elevation: Ensure the grate elevates the cooking surface to allow for effective temperature control, preventing overheating.
- Airflow Enhancement: Select a grate design that allows sufficient air circulation underneath, which is crucial for efficient combustion and even heat distribution.
Following these guidelines will help you select a grate that enhances the functionality and efficiency of your rocket stove.
Grate Placement Techniques
When setting up your rocket stove, it’s crucial to choose a durable grate that can withstand high temperatures without warping. Ensure that the grate is made from a heat-resistant material.
Properly position the grate on top of the cinder blocks to create a stable and efficient cooking surface. The grate should adequately cover the stove’s opening to optimize airflow and prevent direct flame contact with the cooking pan. This setup helps in distributing heat evenly, thus preventing hotspots and ensuring uniform cooking.
Adjust the grate’s height to control the cooking temperature effectively. This adjustment feature allows for precise heat management, enabling you to simmer, boil, or fry as required by the recipe, enhancing your cooking experience.
Ensuring Grate Stability
To ensure safe and effective cooking, it’s crucial that the grate is securely positioned on the cinder blocks. Proper installation of the grate directly influences both safety and the quality of cooking. Follow these steps to ensure the grate is stable:
- Check Fit: The grate should rest over the cinder blocks without slipping into the opening.
- Level Surface: Make sure the cinder blocks are even and stable to prevent any wobble of the grate.
- No Gaps: Ensure that there are no significant gaps between the grate and the cinder blocks to prevent any shifting during use.
- Weight Test: Apply gentle pressure on different parts of the grate to test for movement or dipping, adjusting as needed.
- Heat Consideration: Verify that the grate material can endure high temperatures without deforming.
These guidelines help maintain a secure cooking setup, enhancing both safety and functionality.
Preparing Your Fuel
Collect dry, small branches or sticks that can easily be inserted into the top opening of your rocket stove, ensuring they are dry to facilitate easy ignition and minimize smoke production. Avoid using wet or freshly cut green wood, as these tend to be difficult to ignite and produce excessive smoke. Break larger sticks into smaller segments to simplify the process of feeding the fire, thus helping to maintain a consistent flame needed for cooking.
Below is a summarized guide outlining the optimal types of fuel for your stove:
| Type of Fuel | Size | Notes |
|---|---|---|
| Small branches | 1-2 inches thick | Ideal for sustained burning |
| Dry leaves | Not applicable | Effective for starting the fire |
| Cardboard strips | 2-3 inches wide | Excellent for accelerating the fire |
| Crumpled paper | Various sizes | Enhances burning |
| Twig pieces | 3-4 inches long | Compatible with stove opening |
Ensure you have a sufficient supply of fuel ready before lighting the fire to avoid interruptions during cooking, which could affect the heat source and potentially the outcome of your meal. Adequate preparation allows you to concentrate on the cooking process without the need to continuously manage the fire.
Lighting the Rocket Stove
To light your rocket stove effectively, begin by placing small, dry branches into the stove’s top opening. Starting with a well-structured base of branches is crucial for a robust initial flame.
Next, position a reliable fire starter on top of the branches. Using a fire starter simplifies the process of igniting the branches, ensuring a more consistent and efficient start compared to direct lighting.
Ignite the fire starter carefully, using either long matches or a long lighter to maintain a safe distance from the flames. As the fire starter burns, it will ignite the branches below. At this point, the rocket stove transitions from a simple container to an active heat source.
To optimize the lighting process, adhere to these guidelines:
- Ensure branches are dry: Wet or moist branches hinder ignition.
- Select an effective fire starter: Choose one that ignites quickly and reliably.
- Protect your hands: Use tools that keep your hands away from the flames.
- Arrange branches loosely: This allows air to circulate freely, feeding the fire.
- Be patient: Allow time for the branches to catch fire fully.
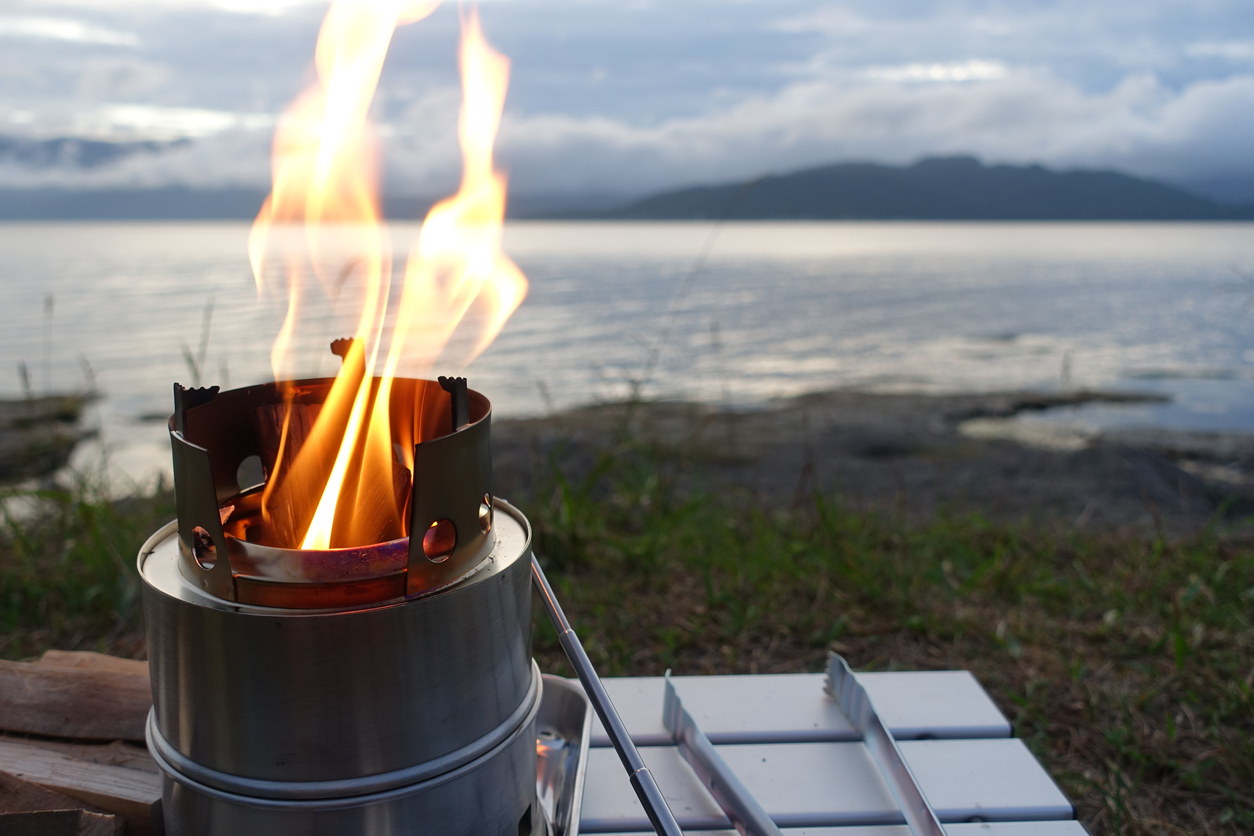
Observing these tips will help you achieve a consistent and stable flame, indicating that your rocket stove is properly lit and ready for use.
Maintaining the Fire
Once your rocket stove is ignited, it’s crucial to sustain the fire. Select appropriate fuel and manage airflow to maintain an optimal flame.
Consistent temperature control is essential for efficient cooking.
Fuel Type Selection
Selecting dry, seasoned wood ensures a stable, efficient burn in your rocket stove, reducing smoke emissions. Here’s a concise guide on choosing the best wood type for optimal cooking:
- Dry, Seasoned Wood: Always choose wood that has been dried and seasoned, as it burns hotter and more uniformly, allowing better fire management.
- Hardwoods: Opt for hardwoods such as oak, maple, or fruit tree wood, which burn longer and emit less smoke, making them superior for cooking.
- Avoid Green Wood: Avoid using green or freshly cut wood, as its high moisture content leads to inefficient burning and increased smoke production.
- Softwoods Option: If hardwoods are unavailable, softwoods like pine can be used but expect a faster burn and additional smoke.
- Prepare in Advance: Ensure your wood supply is collected and prepared ahead of time to have the appropriate fuel ready for use whenever needed.
This guide focuses on the key aspects of wood selection for cooking with a rocket stove, emphasizing the importance of wood quality for performance and efficiency.
Airflow Optimization Tips
To optimize the performance of your rocket stove, it’s crucial to enhance airflow, which is essential for efficient fuel combustion and effective heat production. Here are refined strategies to ensure your stove operates at optimal efficiency:
| Optimization Strategy | Outcome |
|---|---|
| Install a rack under the pot | Improves air circulation |
| Ensure the front remains unobstructed | Facilitates consistent air intake |
| Periodically clear ash | Keeps air pathways unblocked |
| Strategically position fuel | Promotes complete combustion |
These steps are vital for maintaining a robust and continuous flame, crucial for cooking. Positioning a rack beneath the pot elevates it, allowing air to circulate more freely around the fuel, which is essential for maintaining an efficient burn. Keeping the front of the stove clear ensures an uninterrupted air supply. Regular ash removal prevents blockage of air passages, supporting steady airflow. Proper fuel placement is critical for full combustion, ensuring maximum energy is extracted from the fuel, making your cooking process more effective and efficient.
Continuous Heat Management
To ensure optimal performance of your rocket stove, it’s critical to manage the heat efficiently. Here are the steps to maintain an effective and consistent flame:
- Regularly add small sticks: Begin by inserting small sticks into the front opening to maintain a lively flame suitable for cooking.
- Gradually increase stick size: As your cooking continues, introduce larger sticks to maintain a robust and enduring heat.
- Monitor and adjust the flame as needed: Continuously watch the intensity of the flame and adjust the airflow accordingly to maintain a stable temperature suited to your cooking requirements.
- Utilize a rack or grate: Positioning a rack or grate beneath your cooking pan promotes better air circulation and even heat distribution, enhancing the cooking process.
- Keep additional wood accessible: Ensure you have a reserve of wood close by to sustain the stove’s heat output seamlessly.
Tips for Efficient Cooking
Elevate your cooking pan with a grate to distribute heat evenly, preventing hot spots and potential burning. This method also allows for better heat control, enhancing your cooking experience.
Keep a supply of small sticks to feed the fire consistently, maintaining a steady temperature crucial for dishes that require uniform heating. This approach mimics the temperature control you’d find in modern stoves, but with wood.
Monitor the flame closely to make quick adjustments if the temperature fluctuates excessively. Effective flame management is essential to avoid burning or undercooking your food, especially when using basic cooking equipment.
For enhanced efficiency, use a rack at the base of your rocket stove to improve airflow. This leads to a hotter flame, faster cooking times, and reduced fuel consumption.
For long-term setups, constructing a stove from masonry bricks can provide durability and improved function.
Conclusion
You’ve successfully assembled a rocket stove using only a few basic materials! To ensure optimal performance, make sure the cinder blocks are securely positioned and the chimney remains unobstructed.
Use only dry, small branches as fuel to maintain efficient combustion and keep the fire well-ventilated. Place your cooking grate securely and you’re set to cook.
By adhering to these guidelines, you’ll efficiently use the rocket stove for outdoor cooking, leveraging minimal resources sustainably.