Building a Secure Shelter at Your Bug Out Location
When planning to construct a secure shelter at your bug out location, start by selecting a spot that offers both defensibility and accessibility. Consider natural cover and proximity to fresh water sources. Evaluate whether to use sturdy trees for a lean-to, deep snowbanks for snow caves, or a lightweight tarp shelter for flexibility. Each option has unique advantages and challenges. Ensure adequate ventilation and wind protection while keeping essential resources like water and first aid supplies within reach. Careful planning is crucial to make your shelter both secure and sustainable.
Choosing the Right Location
When selecting a bug out shelter, prioritize proximity to fresh water sources, defensibility, and accessibility. Fresh water is essential for survival, so look for areas near rivers, lakes, or reliable springs. Being close to fresh water minimizes dehydration risks and simplifies tasks like cooking and cleaning.
Defensibility is crucial. Choose locations with natural cover such as caves, forests, or hillsides. These features offer protection from the elements and concealment from potential threats. A forested area can shield you from prying eyes and harsh weather, while a hillside can provide a strategic vantage point for monitoring your surroundings.
Accessibility is also important. Ensure your location is remote enough for seclusion but accessible enough for quick reach in an emergency. A location that's too hard to access might leave you stranded when you need to bug out quickly.
Shelter Design Options
When considering shelter design options, it's essential to understand the basics of constructing a lean-to, the techniques for building a snow cave, and the tips for setting up a tarp shelter. Each method offers distinct advantages based on your environment and immediate needs.
Here's what you need to know about each type:
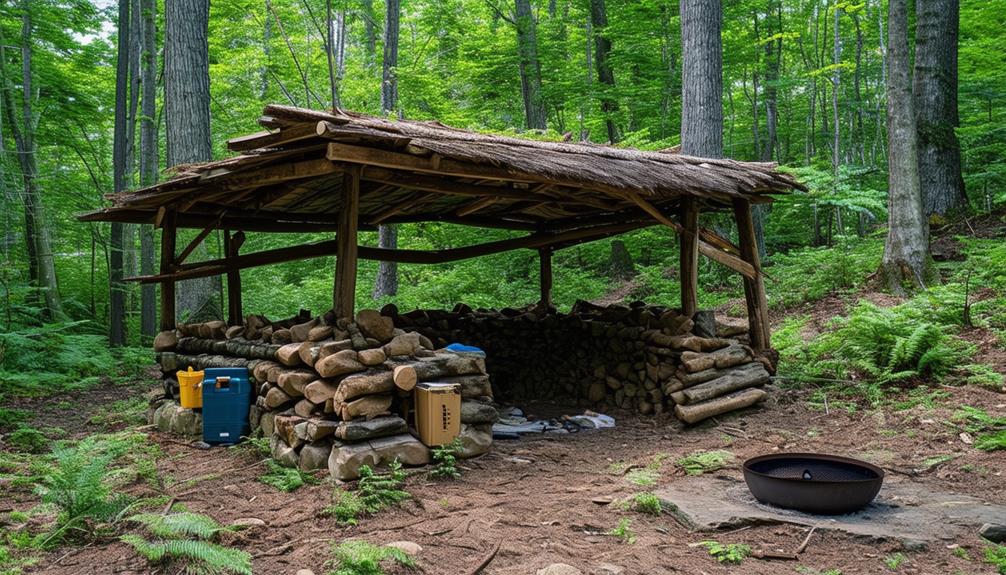
- Lean-to Shelter: Ideal for wooded areas, a lean-to provides a quick and effective way to shield yourself from the wind and rain. It typically involves propping a large branch against a tree and covering it with smaller branches and leaves for insulation.
- Snow Cave: Perfect for snowy environments, a snow cave can offer excellent insulation from the cold. The key is to dig into a snowbank and create a small entrance that leads to a wider sleeping area, ensuring proper ventilation to avoid carbon monoxide buildup.
- Tarp Shelter: Versatile and lightweight, tarp shelters can be set up in various configurations depending on the terrain and weather conditions. Whether you use a ridgeline or tie it between trees, a tarp shelter provides a flexible solution for quick protection.
Lean-To Shelter Basics
Creating a lean-to shelter is a straightforward and effective way to secure quick protection against harsh weather conditions. This type of shelter is particularly useful in emergency survival situations due to its ease of construction, especially if you have a tarp available. Tarp shelters are highly versatile and can be assembled with minimal materials, such as a few branches and natural resources. This setup can significantly enhance your comfort and safety during emergencies.
Step-by-Step Instructions:
Select a Location:
- Find two sturdy trees that are an appropriate distance apart to serve as anchor points for your shelter.
Set Up the Ridge Line:
- Tie a ridge line (a strong rope or cord) between the two trees at a height that allows you to comfortably sit or lie down underneath.
Drape the Tarp:
- Drape your tarp over the ridge line, ensuring it covers you adequately. Secure the lower edges of the tarp to the ground using rocks, stakes, or other available materials.
Optimize for Wind Protection:
- Position the open side of the shelter away from the prevailing wind to maximize protection against the elements.
Alternative Materials:
- If you lack a tarp, use branches and leaves to construct a similar structure. While this won't be as waterproof, it can still provide essential shelter.
Adaptations for Different Climates:
- Warm Climates:
- Lean-to shelters offer good ventilation, which is crucial for staying cool and comfortable.
- Cold Climates:
- Add insulation, such as pine boughs or leaves, to the backside of the shelter to retain heat.
Safety and Durability:
- Sturdiness:
- Always ensure that your shelter's frame is robust enough to withstand potential gusts of wind.
Snow Cave Construction
Constructing a snow cave is a crucial survival skill in snowy environments, providing insulation and protection from harsh weather conditions. To build a snow cave, start by locating a deep snowbank or drift. Dig into it to create an entrance that slopes upward to a sleeping area, ensuring that cold air remains low while warm air rises.
Inside, carve out a spacious area where you can sit and lie down comfortably. The thick walls of the snow cave will trap body heat, maintaining a surprisingly comfortable temperature inside. It's essential to create a small ventilation hole in the roof to prevent carbon dioxide buildup.
Snow caves are particularly useful for winter survival, especially for groups. You can design the interior to be spacious enough to accommodate multiple people, providing a secure and relatively warm space for resting. Proper snow cave construction not only offers shelter but also creates a vital refuge capable of withstanding severe winter weather, keeping you safe in challenging conditions.
Tarp Shelter Tips
Tarp shelters are a versatile and lightweight option for various conditions, offering quick and effective protection. Whether you're facing rain, wind, or intense sun, a tarp shelter can be an invaluable asset at your bug-out location.
In your bug-out bag, include a durable tarp, paracord, and stakes. These items will enable you to set up different designs like the A-frame, lean-to, or plow point, depending on your immediate needs and the terrain. An A-frame provides good all-around protection, a lean-to is excellent for deflecting wind, and a plow point is ideal for quick setups.
When selecting a location for your tarp shelter, consider proximity to a water source for easy access to hydration and cooking. Ensure the area isn't prone to flooding. Keep your first aid kit close by in case of any minor injuries during setup.
Tarp shelters are economical and highly portable, allowing for quick relocation if necessary. This adaptability makes them an excellent choice for both temporary and long-term shelter needs during emergencies.
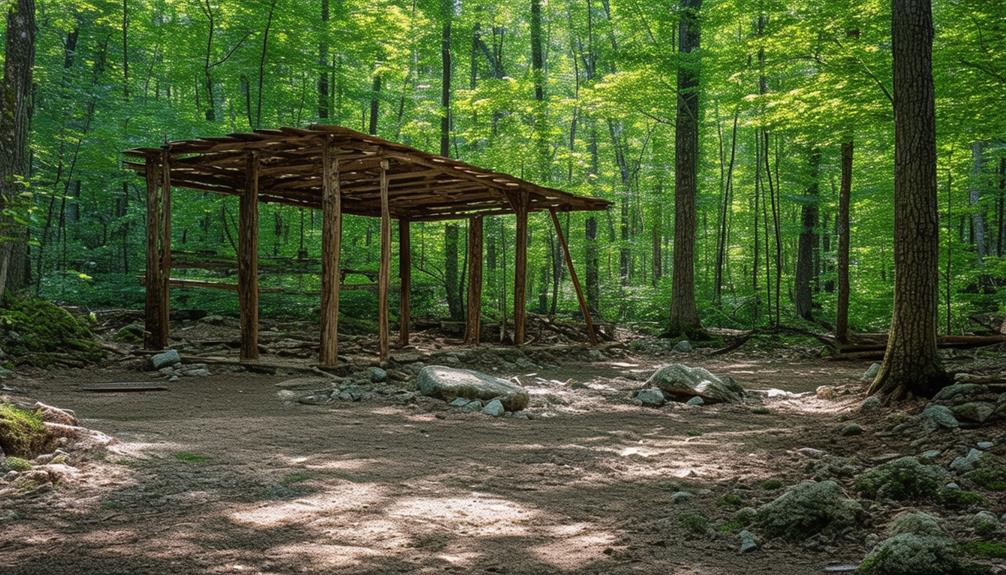
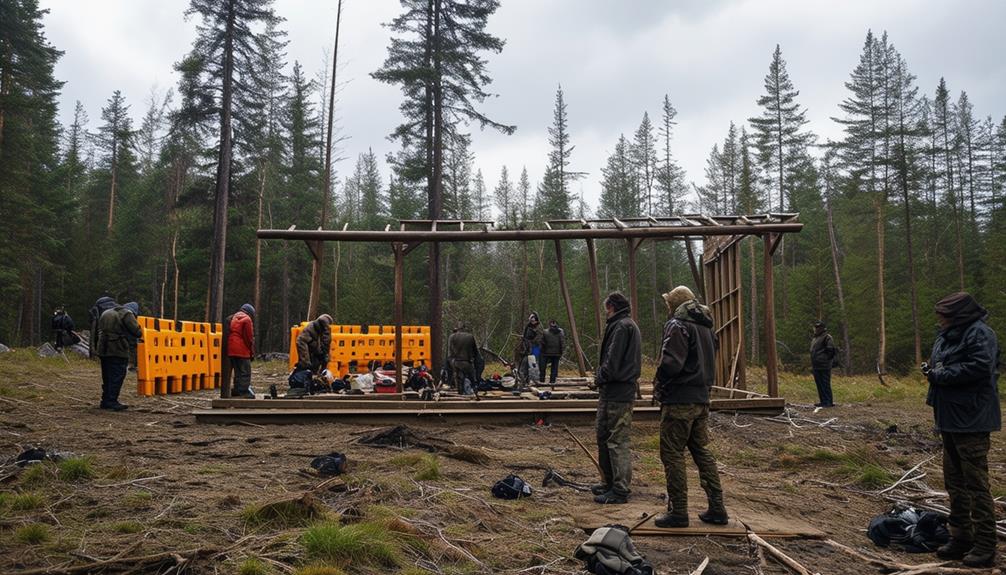
Essential Construction Materials
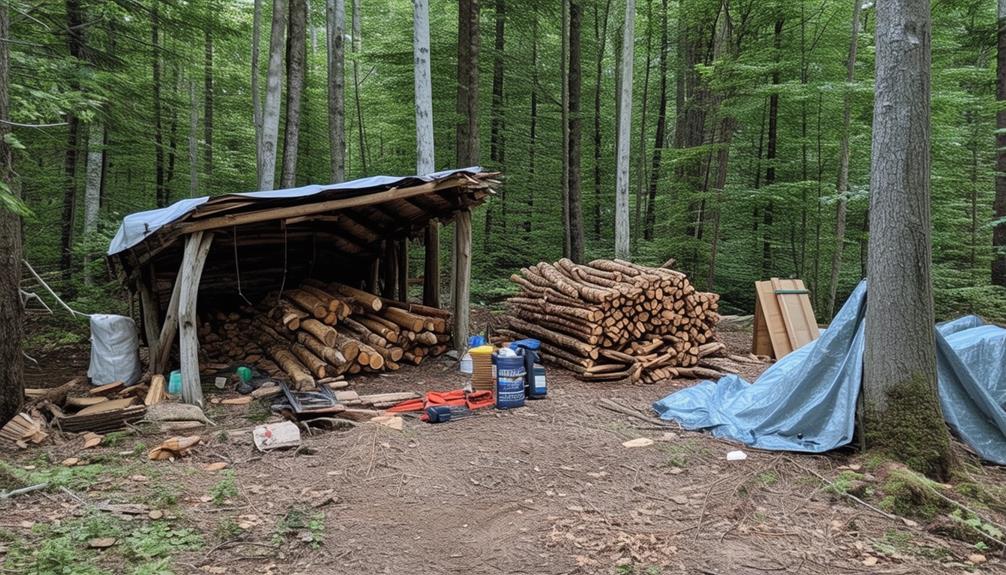
To construct a secure shelter at your bug-out location, you'll need essential construction materials like strong wood beams for framing. These beams provide the structural integrity of your shelter, ensuring it can withstand various stresses and loads.
For the roof, consider using metal roofing materials. Metal roofs are highly durable, weather-resistant, and can last for decades with minimal maintenance. They also offer excellent protection against wind, rain, and even fire.
Concrete blocks or poured concrete create a robust foundation for your shelter. Concrete is sturdy and can endure natural elements, adding another layer of security and stability. Additionally, concrete blocks are relatively easy to handle and can be arranged to suit your specific design needs.
To enhance your shelter's energy efficiency, use insulated panels or foam board. These materials help regulate temperature, maintaining warmth in winter and coolness in summer. Lastly, secure your windows and doors with reinforced steel or heavy-duty locks to prevent unauthorized access. By choosing the right materials, you'll build a shelter that's both durable and secure.
Stocking Essential Supplies
Stocking your bug-out shelter with essential supplies ensures you're prepared for any emergency. Start by securing a substantial stash of non-perishable food items like canned goods, dried fruits, and grains, which have long shelf lives and require minimal preparation.
Next, prioritize water purification methods. Even if you have a water source nearby, it's crucial to ensure its safety. Equip your shelter with purification tablets, filters, or portable purifiers to maintain a clean water supply.
Don't overlook a well-stocked first aid kit. Include bandages, antiseptics, pain relievers, and any necessary prescription medications. Basic tools like a multi-tool, flashlight, batteries, and appropriate clothing for various weather conditions are also essential.
Self-defense options are vital for your safety. Depending on your comfort level and legal regulations, consider items like firearms, pepper spray, or stun guns. Reinforcing your shelter's security with sturdy doors, locks, and possibly even fortified walls will further enhance your protection.
Regularly inspect and maintain your shelter, rotating food items to prevent spoilage and checking for structural integrity. Ensuring your shelter is well-stocked and secure will provide peace of mind during uncertain times.
Water Purification Methods
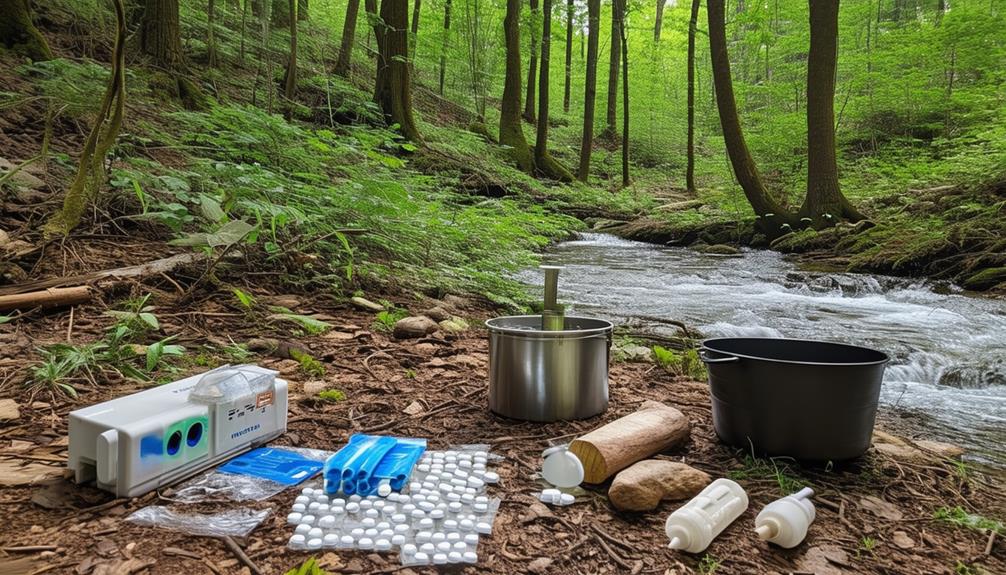
Ensuring reliable water purification methods at your bug-out shelter is crucial for maintaining a safe and drinkable water supply. Various methods can be employed to ensure the water you collect is free from harmful microorganisms and contaminants.
- Boiling: This simple and effective method kills bacteria and viruses. Bring the water to a rolling boil for at least one minute to ensure it's safe.
- Purification Tablets: Tablets made from chlorine or iodine offer a convenient chemical treatment option. Follow the package instructions for effective disinfection.
- Portable Filters: Devices like ceramic or carbon filters can remove a wide range of impurities. They're portable and ideal for emergency situations.
- UV Purifiers: These gadgets use ultraviolet light to destroy harmful microorganisms. They're quick, efficient, and chemical-free.
First Aid and Medical Supplies
To ensure your bug-out location is truly secure, maintain a well-stocked first aid kit that includes bandages, antiseptics, and basic medical tools. Regularly rotate your medical supplies to ensure they remain effective and safe. Additionally, obtaining emergency medical training can be invaluable for handling unexpected health issues.
Essential First Aid Kit
A well-equipped first aid kit is essential for managing medical emergencies at your bug-out location. Your kit should be comprehensive, containing a range of medical supplies to handle various injuries and ailments.
When assembling your first aid kit, consider including the following key items:
- Basic Medical Tools: Ensure you have scissors, tweezers, adhesive tape, and a CPR mask.
- Wound Care Supplies: Include bandages, antiseptics, wound dressings, and instant cold packs.
- Medications: Stock pain relievers, allergy medications, and treatments for digestive issues.
- Specialty Items: Add burn cream, a basic first aid manual, and any personal medications you might need.
Regularly check and replenish your first aid kit to ensure everything is up-to-date and ready for use. By being proactive, you can effectively address injuries and illnesses, providing peace of mind and safety for you and your loved ones.
Medical Supply Rotation
Regularly rotating your medical supplies ensures they're effective and ready for use when needed most. Start by checking the expiration dates on all items in your first aid kits. Expired supplies can be ineffective or even harmful, so replace them promptly. Opt for medications with longer shelf lives to extend usability and reduce the frequency of rotations.
During your medical supply rotation, inspect each item for damage or signs of wear. A torn bandage or a cracked bottle can be just as useless as an expired product. Ensure your first aid kits are complete and restock any missing items. This practice maintains readiness and avoids unpleasant surprises during emergencies.
Keep a detailed inventory of all medical supplies, including expiration dates and quantities. This makes it easier to track what needs replacing and when. Regularly review and update this inventory to reflect your family's specific needs and any changes in health conditions.
Emergency Medical Training
Mastering emergency medical training can make a life-saving difference during a medical crisis at your bug-out location. Knowing how to administer initial aid, treat wounds, and handle medical emergencies isn't just beneficial—it's essential. To ensure you're fully prepared, focus on acquiring basic medical skills and maintaining a well-stocked first aid kit.
Here are four key steps to enhance your emergency medical readiness:
Invest in Training:
- Enroll in courses covering CPR, wound care, and recognizing medical emergencies. This training will equip you with the confidence and skills needed in a crisis.
Assemble a Comprehensive First Aid Kit:
- Your kit should include bandages, antiseptics, medications, and essential tools like tweezers and scissors. Regularly check and update your supplies to ensure they're in good condition.
Practice Basic Medical Skills:
- Regularly practice your skills to remain proficient. Techniques such as dressing wounds, performing CPR, and using medical equipment can save lives.
Plan for Emergencies:
- Discuss and rehearse emergency scenarios with your family or group. Being prepared in advance reduces panic and increases efficiency during actual emergencies.
Security and Defense Measures
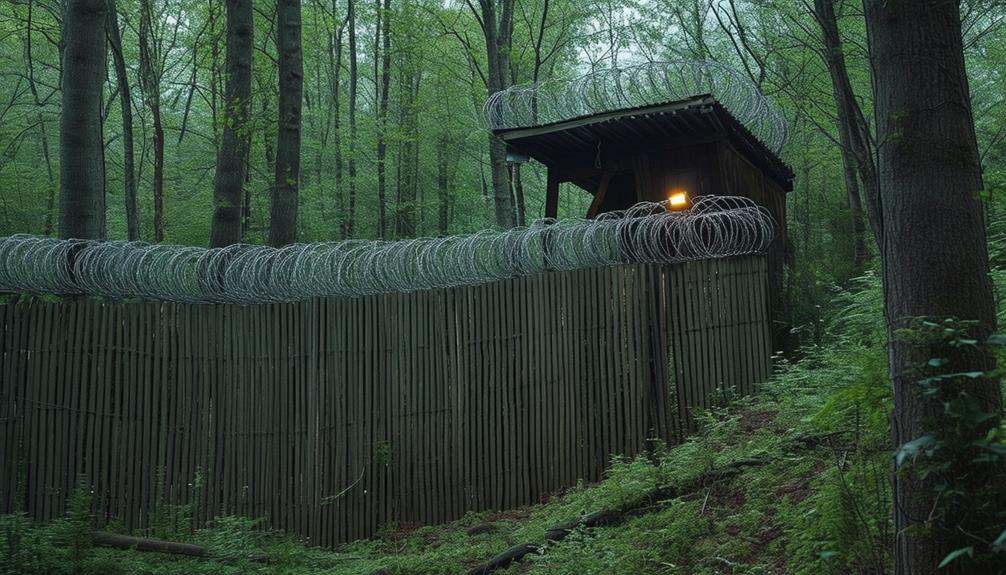
Your shelter's security hinges on robust walls, reinforced doors, and secure windows to deter intruders. Enhancing this physical security can involve installing security cameras and motion sensors for early threat detection. Strategically position security cameras to monitor all entry points and blind spots. Motion sensors can trigger alarms or lights, deterring intruders and alerting you to unusual activity.
Defensive landscaping further bolsters your shelter's security. Plant thorny bushes or dense shrubs near windows to hinder unauthorized access. Gravel pathways that create noise when walked on can make it harder for anyone to approach unnoticed. Additionally, fences and barbed wire offer extra layers of protection, complicating attempts to breach your perimeter.
A strategic layout maximizes visibility and controls entry points effectively. Keep self-defense tools like firearms, pepper spray, or tasers accessible and well-maintained for emergencies. A well-coordinated defense strategy ensures readiness against threats, maintaining the safety and security of your shelter.
Regular Maintenance Practices
Maintaining a secure shelter goes beyond robust defenses; it requires regular upkeep to ensure everything functions smoothly and remains safe. Routine maintenance is essential to keeping your bug-out location a reliable sanctuary during emergencies.
Here are key maintenance practices for your secure shelter:
- Inspect Structural Integrity: Regularly check for signs of structural damage, wear, or weaknesses in walls, roofs, and foundations to ensure they remain sturdy and intact.
- Test Backup Power Sources: Periodically test generators and solar panels to confirm they're operational when needed.
- Rotate Food Supplies: Regularly rotate stored food items to prevent spoilage and ensure a fresh, dependable food supply.
- Implement Fire Safety Measures: Maintain fireplaces, chimneys, and ventilation systems to reduce the risk of fire and ensure safe ventilation.
Consistent maintenance ensures your secure shelter remains in prime condition, ready to protect you and your family in any crisis. By staying proactive, you ensure your bug-out location is a safe and dependable refuge.
Training and Mock Drills
Regularly conducting training and mock drills at your bug-out location is crucial for enhancing preparedness and identifying potential weaknesses in your shelter plans. These drills simulate emergency scenarios, allowing you to test the effectiveness of your shelter's security measures and pinpoint areas needing improvement before a real crisis occurs.
Training sessions are vital because they improve response times and coordination among everyone at your bug-out location. When each person understands their specific role during an emergency, it minimizes confusion and enhances efficiency. Practice ensures that everyone is aligned and ready.
Evacuation procedures should be a core component of your mock drills. Knowing the fastest and safest routes to exit your shelter in various scenarios can save lives. These drills also help you familiarize yourself with security protocols, ensuring they can be executed smoothly when required.
Enhancing Comfort and Livability
After honing your emergency response skills through training and mock drills, it's equally important to enhance the comfort and livability of your bug out shelter. A comfortable shelter can significantly impact your well-being during a crisis. Start by ensuring proper insulation. Using wool blankets or foam mats can help regulate the temperature, making your space comfortable regardless of the weather conditions.
Next, consider portable furniture. Items like folding tables and chairs are essential for creating a functional living space. They're easy to store and transport, and can be set up quickly when needed. Don't overlook basic amenities. Incorporating a portable toilet, solar shower, and cooking equipment can greatly improve your shelter's livability. These items provide the essentials for daily life, even when you're off the grid.
To make your bug out shelter more welcoming, personalize it with items that bring comfort and a sense of normalcy. Here are some suggestions:
- Family photos: Maintain morale by surrounding yourself with cherished memories.
- Favorite books: Offer entertainment and relaxation.
- Solar-powered lanterns: Ensure safety and convenience.
- Battery-operated LED lights: Provide reliable lighting solutions.
Conclusion
By selecting a defensible and accessible location, constructing a durable shelter, and stocking essential supplies, you'll be well-prepared for emergencies. Ensure you purify your water, establish security measures, and conduct regular maintenance. Practicing drills will ensure readiness for any situation. Enhancing comfort and livability will make your shelter a true sanctuary. With these steps, you can confidently face any challenges that arise.
Related posts